Dog Ear Cleaning: A Simple Guide for Healthy Pets
Author:Arooba
Released:January 21, 2026
Keeping a dog healthy involves more than just providing food, exercise, and affection. Grooming is a crucial part of overall pet care, and one often overlooked aspect is ear cleaning. Dogs rely heavily on their hearing and sense of balance, making ear health essential for their comfort and well-being.
According to the American Kennel Club, canine ear infections are very common and are reported to make up 10–15% of all cases seen in veterinary hospitals, especially in dogs with long, hanging ears.
Why Ear Cleaning Is Important
A dog’s ear canal is long and shaped like an “L,” so dirt, moisture, and debris can easily get trapped deep inside. This warm, damp environment creates ideal conditions for bacteria and yeast to grow if ears aren’t maintained properly.
The American Kennel Club’s expert guide on dog ear health explains that this anatomy and trapped moisture are key reasons why infections are common in dogs.
Regular ear cleaning helps to:
- Prevent infections caused by bacteria or yeast
- Remove wax, dirt, and debris
- Reduce unpleasant odors from the ears
- Detect early signs of ear problems
- Keep your dog comfortable and irritation-free
Certain dogs need more attention. Breeds with floppy ears (like spaniels or retrievers) tend to trap moisture, and dogs that swim or spend a lot of time outdoors often accumulate more debris.
Signs Your Dog’s Ears Need Cleaning
Healthy ears should look clean, light pink, and not have a strong smell. Check your dog’s ears weekly. You may need to clean when you notice:
- Frequent head shaking
- Scratching at the ears
- A strong or unusual smell
- Dark wax or discharge inside the ear
- Redness or swelling
- Sensitivity when the ear is touched
Persistent foul odor, discharge, or severe redness are common signs of infection and warrant a vet visit rather than home cleaning.
If symptoms like severe redness or swelling appear, consult a veterinarian, cleaning alone won’t resolve an active infection.
How Often Should You Clean Your Dog’s Ears?
There is no single schedule that works for every dog. The frequency depends on the dog’s breed, activity level, and ear type.
In general:
- Dogs with healthy ears may only need cleaning once every few weeks.
- Dogs with floppy ears or allergies may need weekly cleaning.
- Dogs that swim often may need more frequent ear checks.
Overcleaning should also be avoided. Cleaning too frequently can irritate the ear canal and disturb the natural balance of protective wax.
The best approach is to check your dog’s ears regularly and clean them when you notice wax buildup or dirt.
Supplies Needed for Ear Cleaning
Before starting, gather all necessary supplies to ensure a safe and comfortable experience for your dog:
Veterinarian-approved ear cleaning solution – loosens wax and debris without irritating the ear canal.
Cotton balls or gauze pads – for gently wiping the outer ear and removing loosened wax.
Towels – to protect surfaces and catch any drips during cleaning.
Treats – to reward your dog and make the process positive.
Never use cotton swabs or insert anything deep into the ear canal, as this can push debris further in, damage tissues, or cause pain.
Step-by-Step Guide to Cleaning Your Dog’s Ears
Cleaning your dog’s ears is easier when done gently and calmly. Follow these steps for safe and effective cleaning.
Choose a Calm Environment
Find a quiet space where your dog feels comfortable. This will help prevent sudden movements and make the process easier.
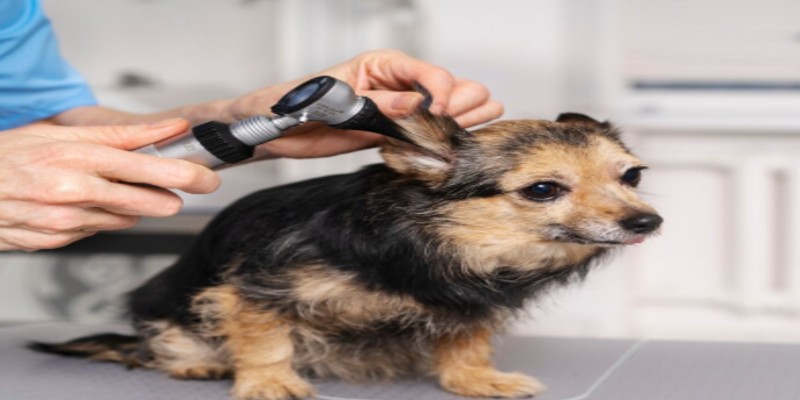
Inspect the Ears
Before cleaning, take a close look at the ear. If you see severe redness, swelling, or unusual discharge, stop and consult a veterinarian.
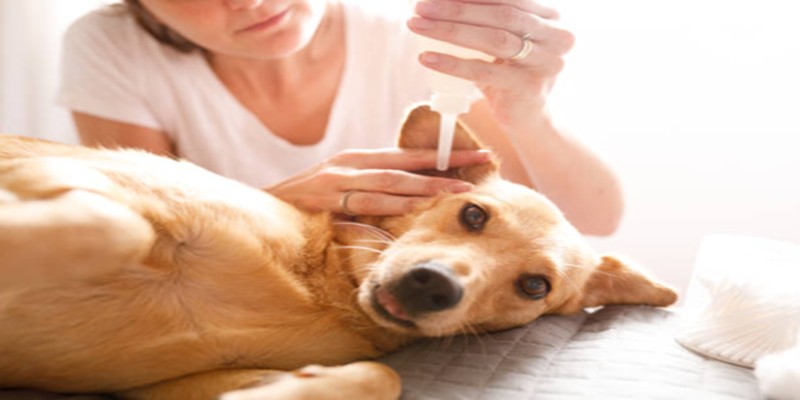
Apply Ear Cleaning Solution
Hold the ear flap upright and gently apply the ear-cleaning solution into the ear canal according to the product instructions.
Massage the Base of the Ear
Gently massage the base of the ear for about 20–30 seconds. This helps loosen dirt and wax inside the canal.
You may hear a soft squishing sound, which is normal.
Allow Your Dog to Shake
Let your dog shake its head. This helps bring debris from the ear canal to the outer ear.
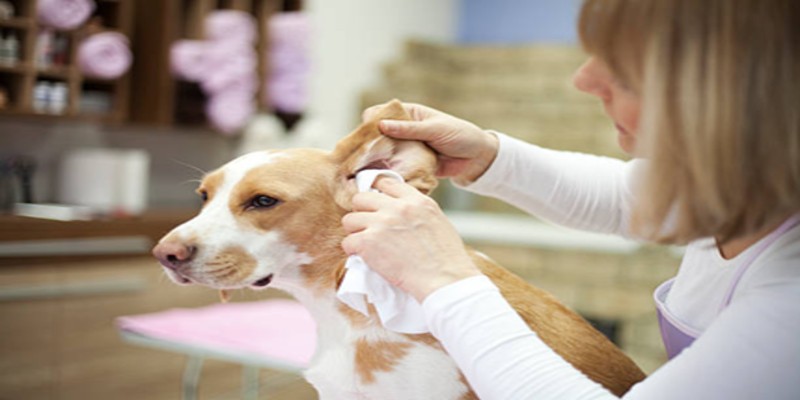
Wipe Away Debris
Use a cotton ball or gauze pad to gently wipe away dirt, wax, and cleaning solution from the outer ear.
Never push cotton or cloth deep into the ear canal.
Reward Your Dog
Give your dog a treat and praise after the cleaning. Positive reinforcement helps them stay calm during future ear care sessions.
Tips to Make Ear Cleaning Easier
Cleaning a dog’s ears can be challenging, especially if your dog is sensitive or not used to being handled. Here are some strategies to make the process smoother and less stressful:
- Start Early and Stay Calm
Begin ear handling when your dog is young or gradually introduce it to older dogs. Gently touch and massage the outer ear, speak softly, and offer treats. This builds trust and creates positive associations, making future cleanings easier.
- Time It Right
Choose a calm moment, such as after a bath or swimming. Moisture trapped in the ear canal can encourage bacteria and yeast growth, so drying and cleaning the ears afterward helps prevent infections.
- Incorporate Into Routine Grooming
Make ear cleaning part of your regular grooming schedule. During brushing or nail trimming, inspect the ears for redness, unusual wax, or odor. Regular observation helps catch issues early and keeps your dog comfortable.
When to Visit a Veterinarian
While routine ear cleaning can usually be done at home, certain conditions require professional attention. Seek veterinary care if you observe:
A persistent or unusually strong odor that doesn’t improve after cleaning
Thick, colored, or foul-smelling discharge (yellow, brown, or black)
Swelling, severe redness, or heat around the ear
Excessive scratching, head shaking, or rubbing the ear against surfaces
Sensitivity or signs of pain when the ear is touched
Behavioral changes such as irritability or lethargy, which may accompany discomfort
These signs can indicate ear infections, mites, or other underlying medical issues that need proper diagnosis and treatment. Early veterinary intervention helps prevent complications, reduces discomfort, and promotes faster recovery.
Caring for Your Dog’s Ears Made Simple
Looking after your dog’s ears might seem minor, but it makes a big difference in their comfort and overall health. Regular cleaning keeps infections at bay, clears out wax and debris, and helps you spot small issues before they become serious.
With a calm approach, the right ear solution, and a little consistency, cleaning your dog’s ears can become a quick, stress-free part of your weekly routine. A few minutes of care can save your dog a lot of discomfort and vet visits down the line.
Paying attention to your dog’s ears isn’t just about hygiene; it’s a simple way to show love, keep them comfortable, and ensure they stay happy and healthy for years.
Related Posts
Stop Your Dog from Stinking: Home Remedies for Skunk & Fish Smell

Is Your Indoor Cat Bored? Simple Ways To Entertain Them
Dog Ear Cleaning: A Simple Guide for Healthy Pets
The Best Automatic Litter Boxes for Multi-Cat Households in 2026

Smart Flea Prevention Strategies for Year-Round Protection